Join my free VIP email list to get

You'be been successfully subscribed!

Big list of activities for prewriting lines and shapes

Share on facebook
Facebook
Share on twitter
Twitter
Share on linkedin
LinkedIn
Share on pinterest
Pinterest
Share on email
Email

What are some activities to work on prewriting lines with minimal materials?

Looking for the developmental progression of prewriting lines? Click here.

There are many engaging activities for prewriting lines, strokes and shapes. One of the most obvious ways to work on prewriting lines is using paper and crayon. This is perfect if you do not have many materials or if you are trying to work on prewriting lines during teletherapy. An adult can make the lines and then, students can imitate the lines. Adults can draw pictures and have students draw their own pictures. 

If you’re looking for a prewriting workbook, sign up for my email list to get access to this prewriting resource! 


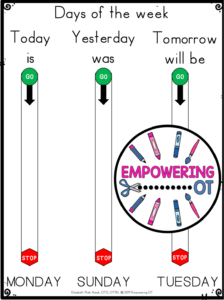
One of my favorite ways to work on pre-writing lines is to incorporate the practice into a school day. One example is to use pre-writing lines during calendar time. Students can answer the questions by drawing pre-writing lines (ie: day of the week, weather). Check out the resource here.


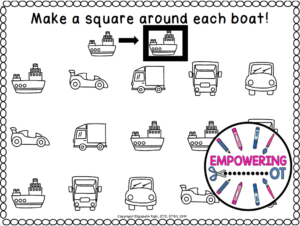
Another beneficial way is to give students a piece of paper with different stickers or drawings. Have students find different pictures and use a prewriting line to mark a certain picture or shape. If you want a pre-made resource, check the resource out here.

Fun activities to work on prewriting lines by using other materials:

  • Chalk. You can have students write with chalk, then use a wet towel or wipe to make the prewriting lines disappear. This is a sneaky way to get double practice of prewriting lines.
  • Wikki sticks
  • Bingo daubers
  • Use glitter glue to trace pre-writing lines. Once the glue dries, this is a great way to allow children to trace to practice lines with tactile feedback.
  • Mini pompoms or mini erasers. You can have students use tweezers to pick up the small objects to make pre-writing lines.
  • Play dough. Students can use a dowel to make prewriting lines or roll the playdough to form lines / shapes. 
  • Yarn / string
  • Using their finger or arm to sky write.
  • Blocks or legos. Students can line up blocks or build with blocks to imitate prewriting lines.
  • Pennies or coins. Here’s a resource with visuals for students to match the pennies to the prewriting lines that includes 36 task cards.
  • Paint or finger paint.
  • Use stickers to have students make pre-writing lines
  • Fill a tray with sand, shaving cream or sprinkles. Have students use their finger or a paintbrush to form prewriting lines
  • Make BINGO cards to play prewriting lines BINGO. If you are looking for premade cards, here is a resource for you.
  • Have students tear tissue paper and roll the tissue paper into balls. Then have them use these tiny balls to make prewriting lines or shapes.
  • Use a piece of paper or cardstock to cut out a stencil to make prewriting lines. (Bonus: if you have a Cricut, you can use your Cricut to cut out the stencil). Use the stencil to give feedback to students while they are practicing the pre-writing lines.
  • Use q-tips and paint to paint prewriting lines and shapes
  • Use popsicle sticks to form prewriting lines
  • Use a sensory bag (a ziplock bag with hair gel). 
  • Whiteboard and markers

If you want already premade prewriting lines task cards that you can use with these materials, check out my resource here. You just need to laminate the cards to use with different materials.

Looking for a PDF of this to give to parents? Sign up for my email list to get access to this PDF and a freebie library!

Looking for a unique way to assess prewriting lines? Check out my blog posy about assessing using the sun and house method! 

Share on facebook
Facebook
Share on twitter
Twitter
Share on linkedin
LinkedIn
Share on pinterest
Pinterest
Share on email
Email

One Comment

Leave a Reply

Your email address will not be published.

You may also enjoy...

Look around

let's connect

Join my free VIP email list to get

Thank you for subscribing!

DISCLAIMER: Elizabeth Kosek is a Licensed Occupational Therapist , but is in no way representing herself as such with the content of this blog or through her resources. By using this website or any resources, you agree that this activity is not intended to replace skilled therapy services, consultation, treatments and does not replace the advice of a physician or occupational therapist. Speak with your physician or OT if you have questions. Information provided should not be used for diagnostic or training purposes. Stop any activity if you are unsure about a child’s reaction or ability. Empowering OT is not liable for any injury, accident, or incident that may occur when creating or replicating any of the activities or ideas found on this blog or contained within any resource provided here.